Upload to Print: Choosing Print Options
Choosing the print options for your uploaded document is how users will configure how the document will be printed and finished.
Clicking the Print Options button as highlighted with the red arrow below, begins the print option configuration process.

Custom verses Canned Configuration
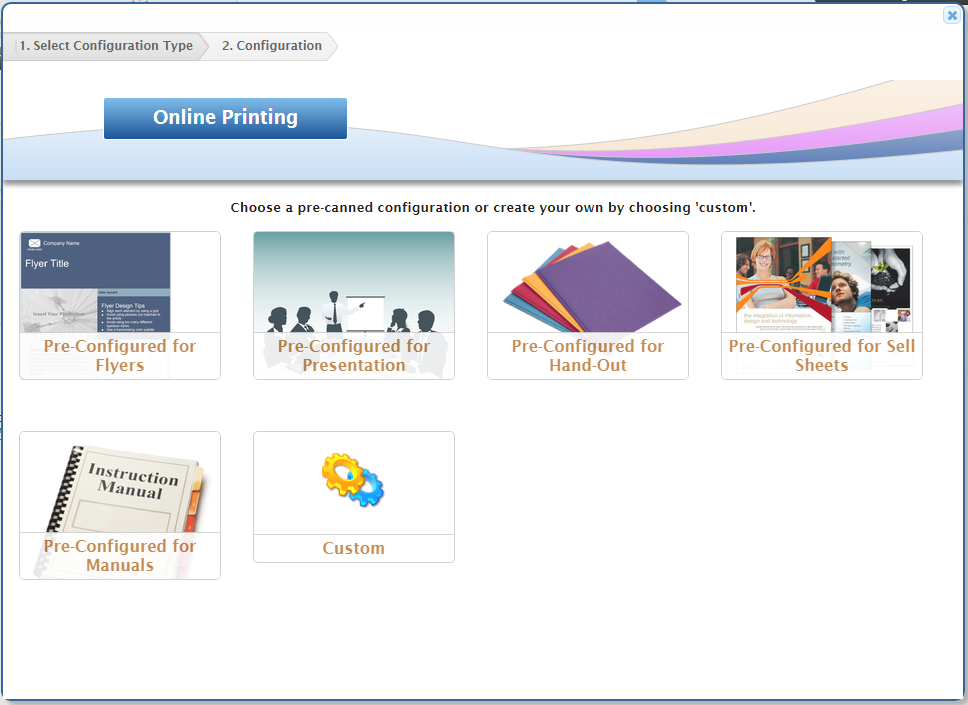
The screen shot below shows canned print options.

The first screen you are presented with offers you a choice between choosing from a list of available canned options or choosing the Custom option to define your own options.
- The list of canned options will vary depending on your organization’s setup.
- Each of these canned items is an Ad Hoc catalog item that has been pre-configured by an Administrator to make the end user's choice easier.
By clicking on any of the other non-custom choices, you are accepting the pre-configured options. The screen will close and no further action is required.
If you choose a canned option, you always have the option to click Print Options again to change your selection.
Custom Print Options Configuration

| Name | Description | |
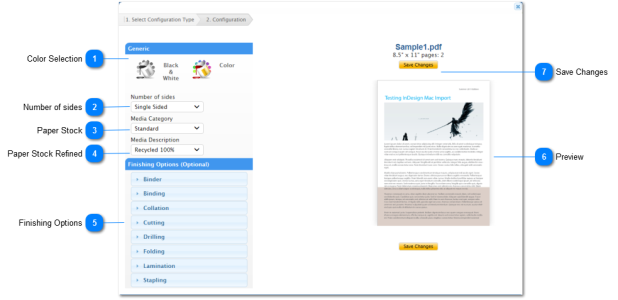
| 1 | Color Selection | Choose between Black & White or Color for this document |
| 2 | Number of Sides | Double sided or single sided. |
| 3 | Paper Stock Refined Category |
Choose from a list of available paper stocks. Your choices here will further refine the list of options available in the subsequent menu. Note: Some options are only available based on the number of pages in your document |
| 4 | Paper Stock Refined Sub Category | This menu provides a further detailed list of paper stock options to choose from. |
| 5 | Finishing Options |
Finishing options are an optional set of configurations that inform print operators how to produce your document. ContentWelder will ensure that a valid combination of finishing options can be selected by preventing you from choosing conflicting instructions. |
| 6 | Preview | Here you can flip through the pages to ensure that they are all present. |
| 7 | Save Changes | Once you've completed configuration of your print options, click the Save Changes button to save your selection. |
